


")
Arduino-Based Health Monitoring System Using MAX30100, LCD, and Blynk
1. Introduction
The advancement in embedded systems and IoT (Internet of Things) has revolutionized the healthcare industry. One such innovation is the development of compact and portable health monitoring systems. This report outlines the development of a health monitoring project using the Arduino microcontroller with the MAX30100 pulse oximeter sensor, which reads a person’s pulse rate and SpO2 (blood oxygen saturation) levels. The data is displayed locally on an LCD and transmitted wirelessly to the Blynk app via a Wi-Fi module, making real-time remote monitoring possible. The system is powered using a 5V DC power source.
2. Objective
The primary objective of this project is to create a real-time, cost-effective, and portable health monitoring device that:
-
Measures pulse rate and blood oxygen level (SpO2).
-
Displays data on an LCD.
-
Sends data wirelessly to the Blynk mobile app using a Wi-Fi module.
-
Operates on a 5V DC power supply for portability and energy efficiency.
3. Components Used
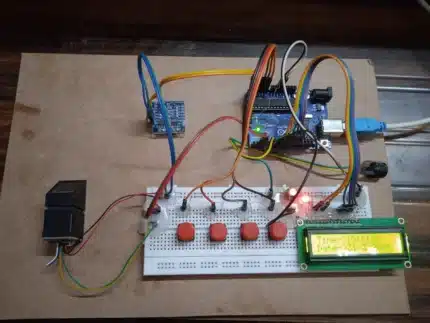
3.1 Arduino Uno
The Arduino Uno microcontroller is used as the central processing unit. It reads the data from the sensor, processes it, displays it on the LCD, and communicates with the Wi-Fi module.
3.2 MAX30100 Pulse Oximeter Sensor
The MAX30100 is an integrated pulse oximetry and heart-rate monitor sensor. It uses two LEDs (red and infrared), a photodetector, and signal processing to detect oxygen saturation and pulse rate. Communication with Arduino is done via the I2C protocol.
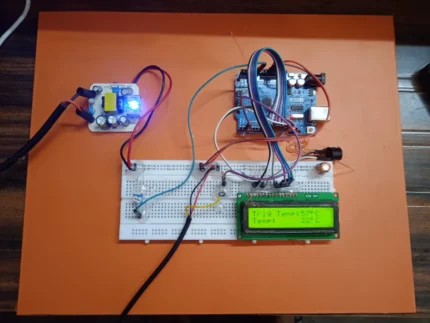
3.3 16×2 LCD Display
A 16×2 character LCD is used to display the measured pulse rate and SpO2 values in real-time. This allows local monitoring of the data.
3.4 ESP8266 Wi-Fi Module
The ESP8266 is used to transmit sensor data from the Arduino to the Blynk cloud server. It allows the user to monitor health metrics remotely via a smartphone.
3.5 Power Supply
The entire system is powered using a regulated 5V DC power supply, suitable for powering the Arduino and peripheral components.
4. Working Principle
The MAX30100 sensor continuously monitors the user’s finger placed on the sensor module. It measures the pulse and SpO2 levels using optical techniques and sends this data to the Arduino via the I2C protocol.
The Arduino reads the I2C data using the Wire library and processes the values. It then displays the values on a 16×2 LCD for instant viewing.
Simultaneously, the Arduino communicates with the ESP8266 Wi-Fi module over a serial interface using the SoftwareSerial library. Using the Blynk library, the Arduino sends the pulse and SpO2 data to the Blynk cloud server, which is accessible through a mobile app.
This way, real-time health data can be monitored locally via LCD and remotely through the Blynk application.
5. Circuit Diagram
The major connections in the circuit are:
-
MAX30100 to Arduino:
-
SDA → A4
-
SCL → A5
-
VIN → 3.3V
-
GND → GND
-
-
16×2 LCD to Arduino (using potentiometer for contrast):
-
RS → D7
-
EN → D6
-
D4 → D5
-
D5 → D4
-
D6 → D3
-
D7 → D2
-
-
ESP8266 to Arduino (via SoftwareSerial):
-
TX → D10
-
RX → D11
-
CH_PD → 3.3V
-
VCC → 3.3V
-
GND → GND
-
-
Power Supply:
-
5V regulated input to Arduino
-
3.3V LDO Regulator to power MAX30100 and ESP8266
-
6. Software Implementation
6.1 Libraries Used
-
Wire.h – For I2C communication with MAX30100.
-
LiquidCrystal.h – For controlling the 16×2 LCD display.
-
SoftwareSerial.h – For serial communication with the ESP8266 Wi-Fi module.
-
MAX30100_PulseOximeter.h – For interfacing with the MAX30100 sensor.
-
BlynkSimpleEsp8266.h – For communication with Blynk cloud server.
6.2 Code Logic Overview
-
Initialize all libraries and configure sensor and display.
-
Begin serial communication for both debugging and ESP8266 communication.
-
Read data from MAX30100 using I2C.
-
Update LCD with current pulse and SpO2 readings.
-
Send the same data to the Blynk server over Wi-Fi.
6.3 Blynk Configuration
-
Create a new project in the Blynk app.
-
Add two Value Display widgets for pulse and SpO2.
-
Assign virtual pins V0 and V1.
-
Use the Auth Token in the Arduino sketch.
7. Features and Benefits
7.1 Real-Time Monitoring
Data is instantly available on both the LCD and mobile app.
7.2 Remote Access
Using the Blynk platform, health data can be monitored from any location with internet access.
7.3 Portable and Low-Power
The device is compact and runs on a 5V supply, making it ideal for portable applications.
7.4 Cost-Effective
All components used are inexpensive and easily available, making it suitable for educational and prototype-level medical applications.
8. Applications
-
Home Healthcare: Users can monitor their vital signs without visiting hospitals frequently.
-
Remote Patient Monitoring: Doctors can observe patient vitals in real-time through the internet.
-
Fitness and Wellness: Can be used to track exercise and oxygen levels in real-time.
-
Emergency Kits: Useful in ambulances and emergency medical kits.
9. Challenges and Limitations
-
Power Requirements: The ESP8266 and MAX30100 are sensitive to voltage and must be powered carefully (only 3.3V).
-
Sensor Accuracy: The MAX30100 is suitable for educational use but may not match medical-grade devices in accuracy.
-
Network Dependency: Remote monitoring depends on reliable internet connectivity.
-
Interference: Poor placement of the finger or movement can affect the readings.
10. Future Enhancements
-
Battery-Powered Version: Add a rechargeable battery and battery charging circuit for full portability.
-
Add Temperature Sensor: Incorporate body temperature monitoring for a more comprehensive health device.
-
Improved UI: Develop a custom mobile app interface instead of using Blynk.
-
Data Logging: Add SD card support for storing data offline or send it to cloud databases for long-term analysis.
-
Alert System: Add buzzer or app notifications for abnormal readings.
11. Conclusion
This project demonstrates the integration of sensor data acquisition, local display, and remote transmission using Arduino and IoT technologies. The combination of MAX30100, LCD, and Wi-Fi communication with Blynk makes it a powerful prototype for remote health monitoring systems. Although it is not meant for clinical diagnosis, it shows the potential of DIY healthcare monitoring systems, especially in regions with limited access to medical facilities.
By optimizing and enhancing this prototype, it can be further developed into a reliable and user-friendly healthcare solution.


Reviews
There are no reviews yet.